Sunday, January 15, 2012

First attempt at inside store details

There have been some great looking interior building details done on a few of the blogs that I follow and I wanted to try this myself.  While I had done some interior details before on such buildings as a interlocking tower or a gas station, this would be the first time I have attempted this on some sort of retail store.  I am currently working to finish the block of Green Max stores and selected a dry cleaning store to try it out on.

The first step was to create a believable floor so I used Microsoft Visio to make a simple pattern and printed that on white paper and glued to the base.  The tiles scale out to about 16 inches.
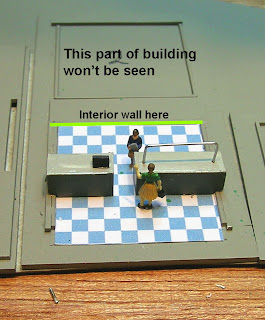


Next I needed just enough detail parts to make it look right.  I made a pair of counters from scraps of styrene with one having a cash register and the other having a pole / rail to hang finished cleaning.  This was made of .010 brass rod.

I only had to detail the front half of the building as the back half, the actual dry cleaning plant will be hidden by an interior
wall.


I then went back to the computer and created what I thought would be the appropriate wall features again using Microsoft Visio.  A photo of a dry cleaning trolley system was found then reduced and added to the wall to simulate the room beyond the wall.  As I  don't yet know how to incorporate Japanese characters into a sign I could print, the price list is just gibberish that will be too small for anyone to actually see.  This was then glued to the inside walls of the front of the building.


Interior details won't be seen if they are not lighted. I added 2 bright LED light boards from Atlas engines with the LED bent down from the ceiling.
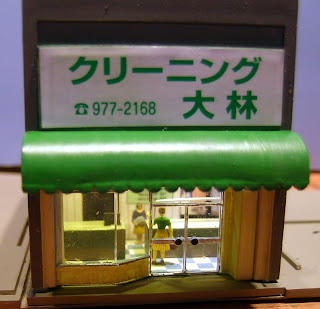

Here is the finished dry cleaning store with the LED's on.  To make working with the interior easier I did not install the front window & door part until just prior to mounting the building on the base and had selected one that is mostly clear.

The next store to receive this treatment will be a book store in the same block.

Saturday, January 7, 2012

Working with removable bases

Many of these smaller buildings I group together into a scene mounted on a removable base.  My favored method for attaching this type of base or individual building to a module is to put 2 or more 4-40 screws through the base and extending long enough to secure under the module with nylon standoffs as shown in the October 2010 post Attaching Buildings.

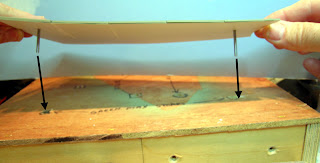
The biggest advantage making smaller scenes on removable bases is that all of the work can be done comfortably at the work bench.  The problem is what to do with the long screws that stick out of the bottom of the base.

At first I used rolls of tape but I found that not to be very stable.
 
The better solution was to build up a little platform from scraps of wood and then drill holes that match the screws.
Here is this platform in use on the work bench recently while I was working with the Green Max stores.

Notice the black markings on the platform. The holes are marked to show which ones to use for each of the removable bases so the same platform can be used for many removable bases.

Sunday, January 1, 2012

New Years Wishes

Thank you to all those who throughout the past year have inspired me with their own work or who have encouraged me with their kind comments.  May 2012 be an enjoyable and fulfilling year for us all.

N scale residents of Tokyo enter a Soba ( Buckwheat Noodle ) restaurant in Musashi-Koyama to have a traditional new years meal of long noodles to symbolize long life.  The shop owner enthusiastically greets them at the door as they often do in Japan.


Happy New Year everyone !